Showing posts with label Helmar Adhesives. Show all posts

Tuesday, January 24, 2012

Yummmmmmmm!


How much do you love cupcakes?  I never considered myself having a sweet tooth until now.

If  you would like a full tutorial on how to make this card click here to go to the May Arts blog. It is May Arts and Hero Arts blog week. That means there is a giveaway!!!!!!!!

I used May Arts striped Twill (I looooooooooooove this ribbon so much!!!!!!)  and the cardstock is Core'dinations.

{click on images to make them larger}


I scored along the chevron stripes of the cupcake liner.


Photobucket

Friday, January 07, 2011

It's a Snow Day!

Two hour snow delay today!!! Don't you wish you could go out and play for an hour and still have the energy to go to school? LOL! I love kids ;)

It's time for Cards on Friday! Hahaha...seriously no rhyme or reason to that. I just have to catch up on sharing some cards.

OH and a quick note....today is the LAST day to leave comments over at the Core blog to win some Core'dinations Cardstock!!!!! We had an awesome week teaming up with Helmar. Speaking of Helmar...all these cards are using their adhesives. Zap Dots...450 Quick Dry adhesive...tape runnner...you name it! AND they are doing a give-a-way on their blog, too ;)

This first card is on the Core blog today using some Jenni Bowlin Core Impressions and Vintage cardstock. Oh and some Unity stamps and May Arts Ribbon, too. Thought this would be a fun gift for my scrappy friends so I can give them some pins (we always swap stuff). Too bad I made this awhile ago and totally forgot about them come Christmas time. So typically me!


AND my Thanks card for Webster's Pages January Challenge. Thought this sentiment was just too perfect for my time with them this past year.


Oh, and a Merry Christmas card featuring the petite 6x6 paper from the Webster's collection. I loooooove these!!! The stamps is a Unity Webster's stamp embossed with clear embossing powder. I like the pop of color from the Jillibean Soup felt flowers.


Friday, December 31, 2010

Happy New Year!

HAPPY NEW YEAR! BRING ON 2011!!!


I just wanted to post a quick update with some 2011 goodies. I made my 5 for 5 journal this week so I am ready for my 5 goals in 5 months starting January. I didn't do this the last half of last year and it's funny because I feel like I don't have any direction.

I always get excited for a new year. New days, new dreams, new adventures, new goals and good bye to yesterday. I never was very sentimental and I know people always think I am crazy for that(don't get me wrong I am not cold and callous, LOL, I just try and keep yesterday there). I guess I just like to move forward instead of living in the past. I think it started when I stopped questioning myself. I made a pact that I would never allow myself to ever "what if" a decision that I made again. I kept dwelling on decisions that I made, thinking I might be somewhere else if I had made a better decision. But then the more I thought about it, what made it a wrong decision? Nothing. It was the right one at the time and anyone can look back and tell themselves it was wrong. Maybe there was a better decision to be made but it was mine, I made it and I AM happy where I am. But that was years ago and since then I made a conscience to choice to look to the future. I do that by setting goals for myself. Every year I give myself 5 goals to do in 5 months. Then, I do it again. Since there are 12 months in a year, I give myself a break for a few months in between ;) Goals don't have to be like taking over the world. They need to be specific, measurable, attainable, realistic, and time specific (SMART-->that's the marketer in me, haha).

I am a firm believer in setting goals. AND I am a firmer believer in writing them down. You must, must, must write them down so you can hold yourself accountable. The funny thing is, I rarely go back and look at them. I just know that I put them on paper and I better stick to it. If we don't hold ourselves accountable, then we rarely have success.

SO! Here is my journal for my 5 for 5 for 2011. {Seriously, want can't you do with a peacock feather!}. Some come and join me on my 5 for 5! It's so much fun and I am telling you...IT WORKS!

Lot's of Webster's Pages Hollywood Vogue on here :) I used Helmar Adhesives for the fabric trim on the Hambly acetate and it worked beautifully!


Other supplies: Core;dinations Black Magic on the card and Bind it All on Journal.

Tuesday, December 28, 2010

Happy Tuesday Morning!!!


I am just checking in with a quickie post...the kiddos are off all week so I am soaking up as much time as I can with them and doing some catch up.

Don't forget about the Webster's Pages Design Team call. Only a few more days left! I cannot say enough about this amazing company.


And here is the next big event happening over at Core'dinations!!! :) :) :) :) :)


SEE YOU IN A FEW DAYS!

Wednesday, December 22, 2010

Christmas Is Blooming!

Have you guys been over to the Core blog for the 12 Days of Techniques? Core is showing off their favorite ways to use their paper AND most days there is a sponsor give-a-way, too!

AND we have a fun even coming up with Helmar in January. The first scrappy even of the New Year ;)


Now on for some BLOOMERS!!! You know I LOVE my Webster's Bloomers with my very sou ;) And I was psyched when these were featured yesterday over at Two Peas for the 20 Days of Holiday sharing. These little trees were super easy to make! I purchased two 6" Styrofoam trees from the craft store (with some help from Andrea at Michaels's ;)

First, wrap the tree with Webster's Patterned paper because some of the Styrofoam will peak through and since they were white it was very noticeable. I used Helmar adhesives and it worked well.

Next, wrap the Bloomers from Webster's Pages around the tree starting at the bottom.

Some Tips: Use push pins to adhere the bloomers because liquid glue gets a bit messy. The pins will also help the patterned paper stay attached to the base.

The final step is to embellish. I used the Webster's Pages Flowers and the fun tinsel trim which I think is so festive!

I chose to do a traditional tree and a more modern looking one and I really like the look of both.


HAVE A GREAT WEEK!!!!!!!!!!!

Monday, December 13, 2010

Say It With Letters Guest Designer

I am so excited!!! A few weeks ago Deb from Say It With Letters asked me to Guest Design. We got to work with these awesome NEST letters that were featured in Simply Handmade Magazine. Deb has a beautiful Etsy store so please go check it out. There are unique wooden designs in there for everyone. I love, love this thought bubble and check this out...you can request your own shape, too! love that idea.

Make sure you check out the blog post here!!! I used Webster's Pages Wonderfall Collection, May Arts ribbon, an SRM sticker and a JBS birdie. OH and I had a nice week of requests! Two cards for May 2011 Cards AND a mini album for the Create: Mini album book. Yippee :):)

OH and today is the kick off for Core'dinations 12 Days of Techniques!!!! TONS of GIVE-A-WAYS!!!!!!!!!!! AND an extra bonus today ;) ;) ;)


Some close-ups...here is the SRM STicker along the length of the letter "T"


And the button and bow....Maya Road pin....


Have a GREAT week. Make sure you come to Webster's tonight for the chat. We are announcing the winners of the Blog hop!!!!!!!!!! I used Helmar Adhesives on here...worked GREAT!

Monday, October 04, 2010

WCMD Hangover

Yep, I spent a ton of time in my craft room this week. I have done 8 cards and a few other little things and I am not done yet, LOL! I have been in there all day today and need to take a break but something came over me. We even went to the pumpkin patch this weekend. I did a killer workout yesterday and the inner thighs are screaming so I am bloggin instead of hitting the treadmill today. SHHH!

Here is a card I created over the weekend using some fun Echo Park Halloween papers. I put the cardstock sticker on a piece of wax paper and ran it through my Cuttleubg. It peels off relatively easy. This one had some skinny parts on the tree so I had to be careful.


I rased the bat, stars and fence with Black Helmar Zap dots.


I also made this little gift box using a clear Pillow Box from FTLOA. I got to work with these ADORABLE MME Alphabet Soup papers and these 52 deck of cards is the CUTEST! I punched holes in the upper left hand corner with my Crop-a-dile and then attached them. I have a guy at work having a baby and I am going to give this (and the mini album I am doing that isn't finished yet) as a gift.


Have a great weekend!!!!

Friday, August 27, 2010

Good Friday Morning!

It is going to be a gorgeous day today here on the East Coast. In most of the area, the kids start school Monday so I am pulling Owen out of daycare for a day at Knoebels. He has no idea!!!

So today was my final post over at Helmar as their Guest Designer for August. Check it out here. I did a layout with my For the Luv of Art kit. The misting is one of the NEW Shimmerz colors that ROCKs called Tuscan Sun.


Have a great weekend!

Friday, August 06, 2010

Happy Friday!

How is everyone's weekend looking? Today I have to work a bit and then we get ready for owen's WIPEOUT party! Wahoo!!

We are setting up an obstacle course in the backyard. It is going to be fun!!! But we have to blow up 650 water balloons tonight, LOL. We probably won't do that many and save some for a later day but that is still a lot.

Today I wanted to share another card I made with the Little Black Dress kit club August kit. I used the Prima packaging on here and the mesh. This fun little piece of trim came with the vintage goodies so I pulled the string to roushe it a bit.

And I used another CPS sketch. I am loving their sketches! It has been awhile since I played along over there.

AND! yes, there is more, LOL! I used my goodies from Helmar :) I am the guest designer over there for the month of August. I used the Liquid Craft glue on here for the trim. Worked fabulously!


I tucked some of the scallop trim from the Sass paper behind here with the sentiment:


OH OH OH!!!!!!! WHO WANTS SOME SNEAKS??? ;) ;) ;) The August For the Love of Art is coming sooooooooooooooooooooooooooooon! :):):)


Wednesday, May 26, 2010

It's Banner Time!

Yes, the banner craze has hit the Cuttlebug Challenge Blog for the Be Inspired challenge #85.

Here is my interpretation of this week's challenge:

I used lots of Webster's papers and Core'dinations....


Here is a close up of the banner...I used three different embossing folders:


That fun post it note print out is from Audrey Neal...I looove these and forgot I had a whole bunch of them printed out....

And I used a Webster's Sparkler as my fastener. I turned it upside down and adhered it with a Zap Dot from Helmar.


Wednesday, May 19, 2010

Gesso Galore!

Gosh, I am not even sure when I bought this gesso by Claudine Helmouth but I need to play with it more! It is a lot of fun and I know people out there love texture as much as I do...so check out this stuff if you get the chance.

A few posts ago, I posted this mini album using LYB papers and a Kaisercraft Mini album. Well, at that time I didn't need the last page. When I looked at it, I realized I could make a fun wall hanging out of it. Why waste it? It was perfect for a wall hanging for the Cuttlebug Challenge Blog #84! I used the A2 Friend embossing folder 37-1132 and cut out the individual words and sanded them {core'dinations cardstock}. The holes along the top were perfect to weave the LYB Generation Z ribbon.

Here it is blank:


Now with some Ghesso, paint, paper and a cutie named Henry ;)


Here is a close-up of the chipboard letters. I used some Helmar Crackle paint on these...


Make sure you check out the Kiki Blog this week for a fun little survey and keep checking back! Kiki is so super generous! hint ;) hint ;) hint:)

Tuesday, May 18, 2010

Rainy Days and Mondays always get me down....

Anyone else love the Carpenters? Well, it's Tuesday and it's rainy and I feel like staying curled up on my couch but that won't get anything done, will it?

Yesterday got away from me. I am a Monday, Wednesday, Friday kinda blog poster ;) So here is yesterday's post, LOL!

Core'dinations released a TON of new product at winter CHA and this layout uses one of them. It's called the Onyx collection. The collection consists of all cardstock that is in the white, grey, and black hues AND it is textured. The sheet I used on my base is all white with a black core...so I sanded the stars very lightly to let that cool core come through. Since I got two sheets of it, I cut out the starts from one of the sheets and layered them {see the close up below}. I used a 5x7 photo on here of owen riding his new four wheeler. He worked really hard to earn it!


I used my Cricut to cut the words and then ran them through my Cuttlebug.


Layered stars with Helmar Zapdots for dimension. Ribbon is from LYB Generation Z collection.


Tuesday, April 13, 2010

myStampBOX goodies and a Studio Calico bag...

What? Yup, you heard me right...myStampBOX goodies and a Studio Calico bag!

I have ordered a few Studio Calico kits here and there and I normally I put these 12x12 bags in the recycling bin but this time I set it on my desk and it kept talking to me, telling me "make me into something" and when I saw the challenge this week over on their blog, I went for it. AND I used some of the new American Crafts Dear Lizzy I got over at Scrapgal.

I turned it upside down, added some closures and just went from there....I explain it below with the detail shots....


Here is a detail of the myStampBOX stamp right on the photo with some Stazon Ink.


I had these little peg things that I used for the wall mount. I adhere the Pink Paislee Chipboard piece {from one of the alpha set I used below} and used my Crop-a-dile to punch a whole through it and the bag. Then I painted the peg "thingy" and added some Glitter to it and stuck it through the whole for the mount.


Here, I used another Studio Calico bag that I had and ran it through my Cuttlebug with a Spellbinder's die for the scalloped flowers. I used Helmar Adhesives for these, too.


And here is the hive that I used some Core'dinations Black Magic Cardstock and a Cricut Cartridge...some Shimmerz on the wooden buttons....

Friday, April 09, 2010

Ribbon Wave ...

is still going strong! We are having a lot of fun over there and you know how I love ribbon {seriously, let's be honest when it comes to scrapping supplies I don't discriminate ;}. So for this week, our challenge was to use 3 pp's, 3 embellishments, 3 diff ribbons and 3 photos and they all had to be different. AND we had to weave the ribbon...so here is my take on this week's challenge. I had to document this look on owen's face..he is such a ham and i knew as soon as he saw this vine that the "mom" was going to come roaring out of me! hence...the title.... ;)


Here is my ribbon weave... I mounted it on cardstock b/c it was much easier to secure and then I put this frame around it. The frame looked blah, so I used some of my myStampBOX stamps on it with some white craft ink. I looove this technique! My Helmar 450 Quick dry Adhesive worked great securing the ribbon down and the frame.

And these fun guys were out for a drive that day, too ;)


Monday, April 05, 2010

Welcome to the myStampBOX Blog Hop!

Today, we are happy to introduce to you our newest additions to the myStampBOX team but we would first like to thank all the wonderful and talented designers that are leaving our team. A BIG thank you goes out:

Elisa Kammerdiener
Kim Soksen
Lara Brooks
Liz Jacob
Marci Knecht
Natalie Kalbach
Trace Geworsky


Thank you for all your hard work over the last 6 months. You’ll always be a part of the myStampBOX family. Best wishes from all of us in your next endeavors!

Now… let’s find out who will be joining the myStampBOX design team. Follow the blog hop and visit each of our returning designer blogs. Each team member will be introducing a new member of our team. At each stop, please leave a comment and when the blog is complete, return to the myStampBOX blog and leave one final comment to have a chance to win a myStampBOX stamp set of your very own!

Jolene Johnston
Virginie Delbecq
Gudrun Loennecken
Ellen Sosnoski
Tina McDonald
Cherie Nymeyer
Tracey Taylor
Allison Cope
mSB Blog

We hope you enjoy our little welcoming blog hop! Don’t forget to leave a comment on each one of the design team blogs and the mSB blog for your chance to win! Good luck and happy hopping!

AND NOW....let me introduce....JING-JING NICKEL!


Here is a little bit about Jing-Jing in her own words:

I am Jing-Jing Nickel. Pronounce it like there are nickels in your pocket making that jingling noise! *laugh* I was born and raised in Shanghai, China. My teenage years were spent in Dakar, Senegal, a West African nation. I went to college in Minnesota and hold a graduate degree in mathematics from the University of Arizona. Now I work full time in the Twin Cities, MN, as an I.T. engineer. When I started scrapbooking in 1999, it was the most perfect extension of my love for traveling and travel photography. Then with the birth of my first daughter, a new dimension of scrapbooking as well as a new realm of creative possibilities was born with her. Today and every day, I scrap my family, my trips, and my family on trips. You can find my layouts, cards, and mini-albums in Memory Makers, Scrapbook Trends, Cards, Scrapbook & Cards Today, and Creating Keepsakes. You can also find me on my blog: http://thislittleartofmine.blogspot.com/

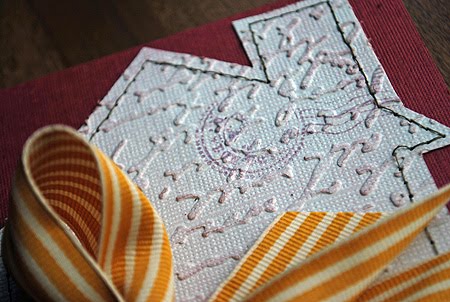
Here is the card I created in Celebration of Welcoming our new Team members:


I used the Road Trip Stamp Set and Helmar Zap Dots for the tag and luggage.