Friday, April 29, 2011

3 Scrappy Boys Guest Designer

Happy Sunday!
I prescheduled this post because I couldn't wait to share some excitement with you!

I was asked to be the guest designer over at 3 Scrappy Boys for May!!!
They have some scrumptious kits and a fun MB.
This month's kit is jam packed with cool embellishments and these fun
Life of the Party papers from Basic Grey.


I was inspired by a Vinni Pearce layout. I am not sure if you buy her digi products or visit her blog but she is amazing and has this cool, fresh style. I first found her when searching for some cool Word Art and has some insanely cool stuff. This is the post with the lo of the pie chart. I just LOVE this idea!


And some textures with my Cuttlebug. I covered the Studio Calico wood
veneer with some Core'dinations Chocolate box.


I have a fun tutorial coming for you for the "Snapshot" title later this week.
i used the NEW delicious gel-a-tins embossing poswers!

Have a great rest of the weekend!!!


Photobucket

Happy Weekend!

Happy Friday!

I have some cards to share today. Wow, come to think of it I have been doing a lot
of cards lately. I guess that is because I have 3 folders of photos to go through and edit, LOL!
I always need to be in the right frame of mind for that.

The cool thing about these cards is that they have NEW CORE! Core'dinations released a Cardmaker Series at CHA in January and both of these cardstocks are part of that release.

First up is a Jenni Bowlin card with the 4x6 paper pads:


I use a die cut and my cuttlebug for the flower.


And next up, I have a card using some Trendsetter from Websters!!!!

And the cardstock is Pearls. I used my Stazon and stamped on the Pearls cardstock. SWOOOOOOOOOON! This paper is insanely cool. I just love it!!! Just that perfect touch of shimmery and shine.


Photobucket

Saturday, April 23, 2011

Some Weekend Cards


Happy Weekend!

What a great week. We had some gorgeous days and today turned out to be one, too. We got hammered with rain the past few days so Owen's baseball game got cancelled anyway because there was so much water but at least we got to hang outside for a bit.

Owen and Henry got bug catchers for Easter and, well, let's just say that we are going to have a fun filled summer of creapy crawlies :)


I have a few Imaginisce cards to share with you. First up is a card for their Paper Piecing challenge this month. I LOVE to paper piece and I got this pattern from Scrapbooks, etc. They have awesome patterns.

Oh and check out these cute stamps from Gel-a-tins! How fun are these little guys...I thought they would be great for gettin' all up in my watermelon ;) AND, I have this obsession with the word "yum". It might be one of my favorite words in the English language, LOL!


I used some Chocolate Box Core'dinations for the seeds. So perfect with that pink coming through! And I used my scalloped Spellbinder's Die for the "bite". YUM!!!


This Live Loud Line was one of my FAVORITES! I love the colors...gray..orange...green and of course everyone loves a good boy line ;)


Tuesday, April 19, 2011

Bridal Shower Favors

Recently a friend of mine asked me to create some party favors for her bridal shower. It is going to be a small, intimate affair so being able to create a one of a kind, unique gift for each of the attendees will be a special treat for each of them. Having an open dialogue with her in terms of theme and colors was important in order to ensure she was happy with the end result.


After deciding on a color palette, it was important to both of us that the women would be able to use the favor again. We went around to various stores and after going to a flea market, we found a variety of these small mason jars that we just fell in love with.

She has bit of an old world, eclectic theme for her wedding so these fit perfectly.
Umbrellas are so fun and the perfect theme for a shower and I knew using my Fiskars tools that I would be able to create a festive altered jar for each of the ladies.


The sticks are bamboo skewers purchased at a local grocery store. Using candy as the jar filler enabled me to be support them so they would stand on their own. Not only is it functional it but it is delicious, too! Each skewer is cut at a different height, allowing you to be able to see each one the toppers at different angles. This is important since they will be sitting on the tables as the guests arrive. Then, I cut various styles with different Fiskars border punches, creating a layered trim border for the neck of the jar.


I couldn't forget about the top of the jar. Adding a scalloped accent along the edge with my Fiskars border punches and a complimentary butterfly ensures that this can be a gift party goers can use again once those candies are gone.


And don't forget about those scraps. Here is a detailed tutorial for you on how to create this raffia by running your scraps through your Fiskars Paper crimper.


The finishing touch is a card for the Bride-to-be. I couldn't resist adding this special card just for her to let her know how happy I was that she asked me to be a part of her special day. I hope you found some great ideas here that you can use on your projects, too.


Monday, April 18, 2011

Playing with Punches and Pluff

Hi there! I have a fun project to share today. Have you heard of Pluffy?

When I was at CHA, I came across this booth. It is a funny story because the gentleman came to use first because he needed some cardstock to match a few things they were doing over there and I told him when we got it unpacked, I would run it over.

Well, I went over and instantly recognized the brand from Michaels (turns out I had picked some up before and had lots of "great" ideas that never came into fruition) and we began talking about Polyform clay and he he gave me some samples to take back to the Core booth. Well, as soon as I got home, I started playing with it and it has such a cool texture. My mind instantly started running.


It's not like the clay you are used to, it isn't sticky...it is very smooth and resilient and it doesn't dry out. Then you bake it when you are done so it hardens. It is so much fun! Because it is so versatile and easy to use, you can easily use your favorite crafting tools when creating with Pluffy.

I used my Fiskars punches, Fiskars Soft Grip Detail knife and Fiskars Hand punch for this project and they worked beautifully.


1.) Roll out the Pluffy and using the Fiskars Circle Punch XX punch a piece of heavy duty cardstock and use as a template on the Pluffy to make the base of the cookie. Use your Softgrip Detail Knife and cut the clay around the punched image.

2.) Next, take the large Seal of Approval punch and press the scalloped edge into the corner of the circle to create the "bite". You will need to apply enough pressure to make an indentation in the clay so you can use the Softgrip Detail knife and cut it out.

3.) Using the 1/8" Hole punch from Fiskars, cut out small holes from the scraps of the Pluffy for the chocolate chips. Again, punch them nice and slow. After each time, open the punch and take out the small circle so they don't stick together. Don't forget to punch a hole in the cookie so you can tie it to your package. You must do this before you bake it.

4.) Press the chocolate chips gently on the cookie base. Bake according to package directions (15 minutes).

5.) Let cool and paint. I added texture paint in between layers to make it feel more like a real cookie.

6.) Spray with some Glimmer Mist for a little shine (just one squirt, not a lot).

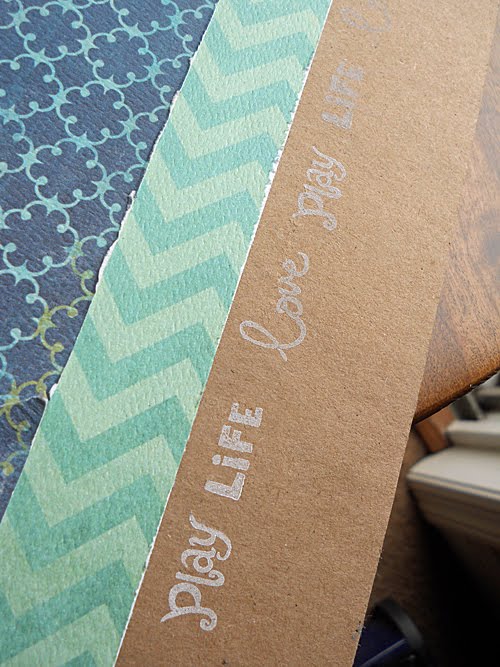
7.) Embellish your cookie bag with some baker's twine, sentiment and journaling spot (I used Core'dinations Cardtock).

Here is a close-up:


Sunday, April 17, 2011

Make Your Own Raffia


Remember that Fiskars paper crimper? Today’s I have a fun and easy Tutorial showcasing a unique way to use that Fiskars crimper with Core’dinations Chocolate Box cardstock. I don't know about you, but this was one of my first scrapbooking tools I ever bought and it has been a staple in my crafting tools ever since.

For this project you are going to need Fiskars Paper Trimmer, Scissors , and Paper Crimper, Core'dinations Cardstock, a Mason Jar and any embellishments you may want to use.

First, using your paper trimmer or scissors, cut very thin strips out of the cardstock. Scraps work great for this, too.


Take the strips of cardstock and run them through the Fiskars Paper Crimper.


Next, sand the strips so the color core of the Core'dinations cardstock is exposed for a unique
look.


Now it is time to use them for your projects! It will look great in gift bags but my favorite is using the raffia for jars.


Now it is time to embellish!


I hope you enjoyed this tutorial and will be able to find some crafty uses for it, too!

Wednesday, April 13, 2011

YIPPPEEEEEEEEEEEEEEEEEEE!


Wahooooooooo!!!! They are posting them all week long so if you
feel like voting??? {wink} {wink}

You vote here.
And my video and the project are here.
You should check out the other projects...there are some amazing things you can do with ribbon!!!! Some seriously crafty people out there.

I created this weaved ribbon cover for a mini album...


The binding and butterfly are Core'dinations Cardstock.


And here is the video!!!! I have to tell you. I am loving making videos these days. Well, for those of you that know me I like to talk so being able to combine that with crafting makes me happy!

Tuesday, April 12, 2011

April Showers

April Showers Bring may Flowers....right??? So I will be thankful for the rain we are getting today. LOL! I can't complain, the breeze we had flowing through the house last night was amazing! And 80 degrees :):):) ... if only for a short moment ;) ;) ;)

So how is your week looking? time moves so quickly. I have some goooood news! I had a few cards picked up for the recent Cricut Magazine calls! Wahoo! I am so glad that I am using it more and more and it is such a great tool to have in your arsenal of scrappy supplies.

You know what else every scrapper should have???? AN I-ROCK! Back in the beginning of the month, I won an i-rock over at the Imaginisce blog!!! Not sure if you have even been over there (I am sure you have) but they are beyond generous with their give-a-ways so check it out. In celebration of my winnings, I wanted to post a fun little project I made with some Imaginisce goodies.

It is a fun little gift card holder and perfect for Spring. I love these crayon boxes. They are so great for all your paper crafting needs.


Some stamping on Core'dinations...


More Stamping... and I cut the layers for the flower & the butterfly with some Spellbinders dies and then embossed it.

And can you see the rubons on the clothespin?


Saturday, April 09, 2011

Just playin' around...

So last night we had a quiet night here and home and we watch the Phillies game and I scrapped. It's so great having an area where we can all hang out. Henry sat with me for a while, too. He played with his guys. They love to sky dive from my drink holder into my adhesive basket and then hang from the ledge. See! I knew that my scrappy stuff would always serve more than one purpose!!! ;) ;) ;)

First up is a card for the Crate Color Challenge. I also threw in my doily stamp with some white pigment ink and embossed the flower.


I didn't have much mojo of my own and I saw on Facebook that MME had their challenge up so I created this layout from the sketch. Our Maxer LOVES to jump when you play catch with him. Well, who needs a tennis ball when you have snow? He will catch snow balls for HOURS!

Again, some white pigment ink with the doily stamp. Best investment EVER! And some Stella MME patterned papers. I loooove the colors. Esp that pop of they yellow/orange.


A Close up of some May Arts Twill.


Monday, April 04, 2011

Good Morning!

First up I wanted to let ya'll know there is a fun blog swap going on with Core'dinations and Jenni Bowlin. Check out their respective blogs for chances to win! Two super duper generous companies. AND Core'dinations has a Design Team Call going on!!!


I did some projects last week for Gel-a-Tins. SO FUN! I love love love these Doodles stamps. They are so versatile!


LOVE love to stamp with my white craft/pigment ink ;)


Here I layered some of the stamps (cut them out first) and then used the cute little heart stamp on the Tim Holtz memo pin.


And a fun card with my NEW favorite ink pad!!!!!!!!!!! AC Charcoal pigment ink!!! {sigh} love love it and I got mine from the For the Luv of Art store! I also got all this FAB MME Stella Rose over there, too!