Showing posts with label Creative Cuts and more. Show all posts

Thursday, November 26, 2009

12 Days of Christmas

I hope everyone had a wonderful Thanksgiving. As I sit here and type as our day is slowly winding down...I just can't believe how lucky I am for having such an amazing family. I know I joke about "brain" a lot but he really is the best. I am so thankful for everything we have. We work hard and it has paid off. Today as I washed dishes, I was even thankful for water. I stood there and wondered {with the water off, of course ;} what it must be like to not have water...to have to walk miles for it and we can wake up and turn on our faucets and it is just there. I just think it is all the small things added up that makes life so wonderful.

In the celebration of the holidays, Websters Pages had a crop and it was a BLAST! If you know me, use every itty bitty piece of my Websters! I participated and got almost every challenge done! I have one on my desk that I just couldn't get done and I am definitely making Karola's house...it is gorgeous....

but here are a few things I created:

This is one of my favorites...I altered a Coffee Cozy! I used Core'dinations Whitewash and my Cuttlebug.

And this is a wall hanging I did with some more Core'dinations from the Chocolate Box collection.


Here is a close-up of this cute little gingerbread house. LOVE this pp!


And then for one of the challenges for making a gift bag, I used the Crayon Box from Creative Cuts& More. I ran the Websters Papers and the tag through my Cuttlebug and finished it off with a myStampBOX stamp from the Hohoho set.


Thursday, November 12, 2009

Holiday Blog Hop

Hi blog hoppers! Weren't Karen's projects great? (If you didn't arrive here from Karen's blog, you don't want to miss what our designers have in store for you! The CC&M Mega Holiday Blog Hop starts here.
If you are participating in the hop you are coming from Karen Maldonado's blog. Didn't she do an awesome job Guest Designing designing for us this hop?  Next hop off to Jennifer Beason for some more great inspiration! 
Now....make sure you follow all the directions listed below to win the kit AND scroll down to get the coupon code for you discount when you go shopping!

For my card I used the Large Felt Snowflake. I made this card fold over at the bottom so you could put a gift card in it and I used the Snowflake Die-cut as my closure. I also added the gem for some added glam. I love using noon-traditional colors this time of year and this Fancy Pants paper and Core'dinations Cardstock are the perfect accents to the Snowflake.


AND HERE IS THE KIT!!!!!!! click here for more details...


Here are the five different ways to win our newest kit:

(A) Leave a comment on this post. (This is limited to one per person unless you meet the criteria of B, C, D and/or E below.)
(B) Leave one extra comment if you've posted a link to this blog candy on your own blog. Make sure to include a link to your specific post in your comment.

(C) Leave one extra comment if you become one of our blog followers. See the right-hand navigation column to follow us.

(D) Leave one extra comment if you click over to our page on Facebook and become a fan.

(E) Leave one extra comment if you invite your crafty Facebook friends to become a fan of our page on Facebook .

AND
As part of our celebration, CC&M will be having a great sale. For the next six days, we will offer 15% off the entire store. But act quickly, it is only active for 4 days. This sale will end on Sunday, November 15. Make sure you enter this code ccholidaybloghop1109 during checkout.

Monday, November 09, 2009

Welcome to Day TWO of the CC&M Mega Blog Hop!

Thanks so much for stopping by! If you don't know, today is the second day of the Creative Cuts & More Mega Recipe Blog Hop which features the Apron Holiday Treats Recipe Kit. It is loaded with unique Apron pages for your album with coordinating Doodlebug Holiday papers and die-cuts. We have 24 designers who will be showcasing wonderful pages and yummy Holiday Treat recipes. As part of the celebration CC&M will be having a great sale. For the next six days, CC&M will offer 20% off the entire store. But act quickly, it is only for six days – this sale will end on Nov 14th. Make sure you enter this code recipebloghop2009 during checkout.

As a continuing part of the celebration CC&M will of course give away great gifts. Each day we will give away one kit. Here is the twist – go through the blog hop, leave wonderful comments for the great designers. After you have finished the blog hop, return to www.diecutdiva.com and instead of leaving a comment, you need to share a recipe to have a chance at winning the kit. Share the recipe on your blog and link it back and get another chance to win the kit. Help us also make this a great recipe swap! We can't wait to see all the delicious recipes...I am getting hungry already ;)

So if you are venturing along blog hop land, you will have come from Rachel's blog. After my blog, you will headover to Celicia's blog. If you get lost you can head over to the Diva blog.

AND if you weren't around yesterday...make sure you check out my post to see how you can follow along for yesterday's hop and the chance to win more goodies!


I printed the recipes directly on the front part of the apron. I just practiced on a scrap sheet of paper and the taped the cardstock on there and ran it through. My printer is an 8.5x11.


Here is a close-up of all the fun little die-cuts and trinkets you get in the kit. They are so fun and just the perfect size to add those fun little touches to your pages.


Here is the recipes for my Grandmother's Butter Cookies and the Hershey Kiss Cookies..they are a tradition in our house!

Grandma’s Butter Cookies

1 lb. real butter 2 tsp baking powder

2 c sugar 2 tsp vanilla

4 egg yolks ¼ cup milk

6 cups flour 2 tsp shortening

Cream shortening, add sugar, mix well. Add egg yolks,

Vanilla and mix well. Add dry ingredients to creamed

Mixture and alternate with milk. Separate and add food

Coloring. Press through cookie press. Bake @ 350 degrees.


Hershey Kiss Cookies

1 tsp salt 1 tsp baking soda

½ c sugar 1 tsp vanilla

2 tbls milk 1 bag of Hershey kisses

1 ¾ c flour ½ c real butter

½ c peanut butter 1 egg

½ c firmly packed br sugar

Blend all ingredients at one time at lowest speed on mixer.

Shape into walnut sized balls. Roll in sugar. Bake @ 375

10-12 minutes on a greased cookie sheet. When out of oven,

Press in a Hershey kiss on each cookie.


Sunday, November 08, 2009

Welcome to the Recipe Blog Hop!

Hi blog hoppers! Weren't Michele's projects great? (If you didn't arrive here from Lila's blog, you don't want to miss what our designers have in store for you! The CC&M Mega Recipe Blog Hop starts here! You don't want to miss it and I don't know about you but I am getting hungry!


Welcome to the first day of the Creative Cuts & More Mega Recipe Blog Hop that features the 8”x8” Treasured Family Recipes Kit. We have 24 designers who will be creating wonderful pages to inspire you. Plus we all will be sharing some of our own delicious treasured family recipes.Make sure you check back at www.diecutdiva.com tomorrow for the Holiday Treats Apron Recipe Kit Blog Hop. We will also have 24 designers who will be showcasing their great creations and sharing holiday treat recipes.

As part of the Mega Hop celebration, Creative Cuts & More will be having a great sale. For the next six days, you can get 20% off the entire store. But act quickly, it is only for six days – this sale will end on Nov 14th. Make sure you enter recipebloghop2009 during checkout for your discount.

As a continuing part of the celebration, each day Creative Cuts & More will give away one kit. Here is the twist, after you have finished the blog hop, return to the
Die Cut Diva Blog and instead of leaving a comment, you'll need to share a recipe to have a chance at winning the kit. Share the recipe on your blog then link it back and get another chance to win the kit.


Here is what you will get in this fabulous kit...


Okay, let's get started with the good stuff! Here is my cover page: I just wanted to let you know how wonderfully this blackboard takes Shimmerz and Glimmer Mists! It dries quickly and doesn't bend or warp.


and a close up...i just LOVE these chunky Cosmo chipboard pieces!


For the inside cover I journaled about what this book is about and what it means to me:

when you get married you begin a journey as a new family, joining the traditions of different generations, different heritages and two very different families. What traditions do we keep? What new ones will we start? How do we do it all And keep the memories of our families alive as we pass them down to our children? This recipe book celebrates the traditions we merged, the ones we made ourselves with our new family by blending the Heinly and the Sosnoski traditions. Some of these recipes were handed down from our grandmothers and aunts and uncles and others are ones we discovered to be our favorites. I am sure these might change along the way, but one thing I hope to do is keep the spirit of tradition alive within the covers of this book.


And this page features my Great Grandmother's Oyster filling recipe....a HUGE favorite in our family. This is the note card that my Aunt filled out when she gave the recipe to me. Her handwriting looks just like my grandmothers.

I used my Shimmerz on here, this is a good shot of how cool they look on the black board.


And a close-up....


Here is the recipe:
6 doz. med size oysters
approx 2 pkgs saltines
12-15 hard boiled eggs
Remember to always start and end with crackers. Layer crackers, then eggs, the oysters {with some of their broth} and repeat until you fill a large Pyrex Bowl. Bake for 1 hr @ 375 degrees and then turn down to 350.

And for the next page and recipe, I chose a new favorite recipe we discovered in our house. My good friend made this for a scrapbooking weekend and now we eat it all the time...even for Dinner! Who doesn't love breakfast for dinner???

oh and p.s...i just love this cute circle memories stamp i used from mSB. it fits the 1" circle punch perfectly!


Here is the recipe:
2 cups Bread Cubes {a great way to use old bread}
1 1/2 / 2 cups shredded cheddar cheese
6-8 eggs
2 cups milk
1/2 tsp salt
1/2 tsp mustard
1/8 tsp onion powder
1 lb cooked sausage, bacon or ham.
Greas a 6x10" pan or double the recipe and use a 9x13". Place bread cubes into dish. Top with cheese. Then combine eggs, milk and seasonings in a separate dish and then pour on top of bread crumbs and cheese. Crumble meat over top and add extra cheese. Bake uncovered @ 325 degrees for 30-45 minutes. You can prepare it the night before and just pop it in the oven, too! I also put a cookie sheet under it in the oven in case of overflow ;)

Click here for the link for the Treasured Family Recipes Kit run and get yours now...it is awesome!


Remember if you get lost, just head back to the Diecut Diva blog!


Ellen Sosnoski http://closeyourears.blogspot.com/ ------> you are here!


Tuesday, November 03, 2009

Welcome to the Caardvarks and CC&M Blog Hop Day THREE!

Welcome to day THREE of the Caardvarks and CC& M blog hop! I just realized now that I forgot my links yesterday. I do apologize for that. I hope you are all having a great time hopping and getting some great ideas for the Holidays!

If you are here for the hop, you are coming from Chris's blog. Don't you love what she has been creating??? Don't forget to hop over to Jennifer's blog when you are done. I know I am...I just loved all of her projects from yesterday.

The one thing I have been focusing on during this crop is simple and cost effective ways to get your Holiday deocrating jump started. You just can't go wrong with Creative Cuts & More die-cuts when it comes to decorating for the holidays. Here are a few things I have done for some easy and inexpensive table decorations.

First off, I created some napkin rings. For this first one, I used some craft wire and wrapped it around my foam snowflake to make a "hook" to attach it to plain napkin ring I already had.

I added a vintage button from my stash {I am SO loving the blue and silver combo right now for the Holidays} with a pop-up dot and then threaded the wire around to the back.


Next, I twisted the wire and bent it down to form a hook to slide it into the napkin ring.


Now you have a clean and simple napkin ring. At 35 cents a piece, if you had 8 people for Christmas dinner, this would cost you $2.80 cents to spruce up your table.


Now for this table setting I used the the Sleigh die-cut. The great thing about the Metallic Cardstock at Creative Cuts & More, is that they don't need a lot of help to look great. I added some holly from my garden, silver balls, pine cones and some gift wrapping ribbon to finish this centerpiece off. Oh, and we can't forget the ambiance ;)


Now you have to check out the Velvet die cuts. They just SCREAM winter and holidays. For this quick napkin ring, I used the velvet snowflake, some hemp and a Jillibean Soup button.


And Don't Forget the Prizes!!!

Halloween Mini Album

Fall Card Kit

Creative Cuts & More $25 Gift Card

So make sure you hit all the blogs listed below to be entered to win!

*Also a 15% Shopping Discount for our readers. Enterholidayhop2009 at checkout.


Discount good from November 1st - 4th.

Now let's get BUSY!

Blog Roll Order

Tanis

Mel

Lucy

Heidi

Kelly

Steph

Sue-ann

Amy

Ashley

Catherine

Peet

Eva

Michelle

Nathalia

Holly Brown

Carla Mayfield

Chris Dickinson {where you came from}

Ellen Sosnoski {you are here}

Jennifer Johnson {your next stop}

Kayla Dupont

Lila Holgate

Lindsay Weirich

Pamela Smerker

Diecut Divas Blog

Creative Cuts & More (sign up for Newsletter):

Caardvarks (leave a comment to let us know you've finished today's hop)

Monday, November 02, 2009

Caardvarks and CC&M Blog Hop Day 2

Welcome to day TWO of the hop! If you missed yesterday, click here to see the deets.
Today I am showcasing probably my favorite die-cut, the Candy box. You can fit your favorite candies in here and they are just perfect favors and little holiday gifts. And you can get them in the gorgeous metallic cardstock that CC&M carries if you wanted to make the a bit more fancy.
So for this one, I added a journal spot and a stamp from myStampBOX. I also sprayed it with Glimmer Mist but I couldn't get a good photo of it...it has rained here for 2 weeks straight.


I added a small 2" x 2" card to coordinate. I just had to use my new Cuttlebug embossing folder! Again, more myStampBOX stamps and a bit of Core'dinations.


Sunday, November 01, 2009

Welcome to the Caardvarks and CC&M Blog Hop

I am so glad you stopped by for the blog hop. For today's hop, I made a festive Holiday card using the Christmas Tree die-cut #4 found here. If you search the store go to Holidays, then Christmas you will find all the holiday die-cuts.


For this card, I ran the Tree through the my Cuttlebug. I love embossing Creative Cuts & More die-cuts because it is an easy way to add some pizazz to them. I also wanted to show you that you don't need a lot of patterned paper for your holiday cards. All you need are some die-cuts, cardstock and ribbon to make a great card. I know we have been on a budget for some time so this is a great way to save some money.


Next, I added some of my favorite stamps from myStampBOX. You can find the HoHoHo stamp set here.


Okay...now for the good stuff! Here is the DL on on the blog hop...first off...

Prizes!!!

Halloween Mini Album

Fall Card Kit

Creative Cuts & More $25 Gift Card

So make sure you hit all the blogs listed below to be entered to win!

*Also a 15% Shopping Discount for our readers. Enter holidayhop2009 at checkout.


Discount good from November 1st - 4th.

Now let's get BUSY!

Blog Roll Order

Tanis

Mel

Lucy

Heidi

Kelly

Steph

Sue-ann

Amy

Ashley

Catherine

Peet

Eva

Michelle

Nathalia

Holly Brown

Carla Mayfield

Chris Dickinson

Ellen Sosnoski {you are here}

Jennifer Johnson

Kayla Dupont

Lila Holgate

Lindsay Weirich

Pamela Smerker

Diecut Divas Blog

Creative Cuts & More (sign up for Newsletter):


Caardvarks (leave a comment to let us know you've finished today's hop)

Friday, October 30, 2009

Creative Cuts and More and Caardvarcks Blog Hop and Core....

Could I get anymore C's in that title, LOL!?

I hope ya'll are ready for the big day on Sunday! I know we have been gearing up for this for awhile now....ready for some serious Holiday inspo? Well make sure you come back here Sunday ;) We are going to be doin' it right!


Here a few sneaks of some goodies i made with my die-cuts from Creative Cuts & More. I also whipped out my Christmas stamps from myStampBOX! So get ready for Sunday, Monday and Tuesday!! We are ready to go and so are the girls from Caardvarks!


Here is a layout I did for the Pimp Your Bra crop over at Serendipity Scrapbooks the other week. There is still a few days to order your Bra mini chipboard album...remember...it's exclusive so once they are gone...they're gone. My challenge was based on the extraordinary Dr. Maya Angelou so the poem I have on there is Phenomenal Woman and the layout is about celebrating ourselves. And she has 30 honorary doctorates so I included that you needed to have at least 30 buttons.

I loaded it with some fun buttons, a myStampBOX date stamp and some Core'dinations. I am in LOVE with grey! it's the new black for me...even got some grey nail polish!!


Thursday, October 22, 2009

baaaad blogger syndrome...

yes, i have bad blogger syndrome...i just needed a break this week. the weather has been gorgeous here so i have been taking the kids outside as much as we can {we are having ladybug infestation right now, bleh} and i have been working alot. i have a few clients i am losing at the end of the next two months so that will free up quite a bit of time for me. yes!

Creative Cuts & More is sponsoring 2sketches4you so you have to run over there and check out the card kit you can win!

I used the mug card found here. I used this awesome technique that Liz showed us over at Serendipity Scrapbooks for the foam. You could use it as icing, snow...whatever! oh...it's called Faux Frosting. I added some Core'dinations and Jillibean Soup goodies and a fun quote i googled.


here is a close-up...i used my NEW Shimmerz on the frosting to give it a bit of sparkle ;)


and don't forget to mark your calendars for this ...it's gonna be a BLAST!

Thursday, October 15, 2009

Creative Cuts and More Blog Hop

Welcome to the October Creative Cuts and more blog hop! Aren't these fun?! If you are hopping than you made your way here via Lindsay's blog. Didn't you just love her projects? If you didn't arrive here from the Creative Cuts and More Blog Hop you may want to start there because that is where the directions are posted to win the Fall All Occasions Card Kit.

I want to remind you to check out the store and the Killer Red Tacky Tape. It is the bomb when it comes to putting die-cut boxes together. I don't know about you but I don't have time to sit there and hold it together until it dries. Also, just enter the coupon code octbloghop1509 to receive15% off your order {good for one week}!

Make sure you head over to Chris's blog when you are done here for some more AMAZING inspiration! And if you get lost along the way click here to go to the Diecut Diva blog.

I used the card portfolio for my first project and the football die-cuts. If you have a football player in your family you have to get these!!! They are PERFECT! and you can run them through your Cuttlebug too....I used pop-up dots to accent the one in the middle.

I added some MyStampBOX Just Add Notes stamps on here too for the journal stamp and note stamp inside.


The is portfolio will hold six cards and envelopes but I chose to use it for photos.


For my next project, I used the pumpkin die-cuts for a mask and then accented the one in the middle with some pop-up dots.


And lastly, I used the short kraft puff box for this project...I put some dried marigold seeds inside for a gift for my friend. We love to garden ;) And some more MyStampBOX Funky Flower stamps.


Thanks for stopping by!!!

Tuesday, October 06, 2009

Cuttlebug Weekly Challenge and Some Blogger Awards

Just wanted to share a card for the Cuttlebug Challenge Blog Be Inspired challenge. We got to use the wonderful digi stamps from Digital Designs. Since I don't have copics and am not a watercolor kinda stamping kinda girl, I printed out the stamp on a scrap paper and then cut it apart. Then I traced bits and pieces of the stamp on Core'dinations and some Dream Street new Spooktacular Halloween paper and added them to the stamp I printed out on cardstock {the grass and outline of the tombstone}. Then i added some googley eyes b/c i love them ;) Using your scoring tools on the black magic Core'dinations is the bomb! That is how i created this super easy border around the card to let the orange show through. { i think i need a better closeup}


Then i used that same yummy Dream Street paper for the inside of the card with the Digi Stamp Halloween sentiment!


I just want to give a quick "shout out" to Citrus Tree Studios. They are having a dt call there, i would highly recommend it. the kits are GORGEOUS! unfortunately since we are on a budget these days i haven't been able to splurge on one but it is the first place i am when i can!

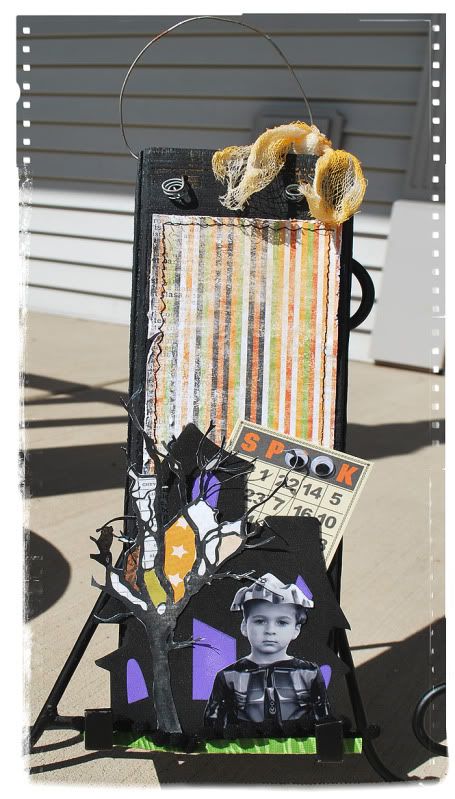
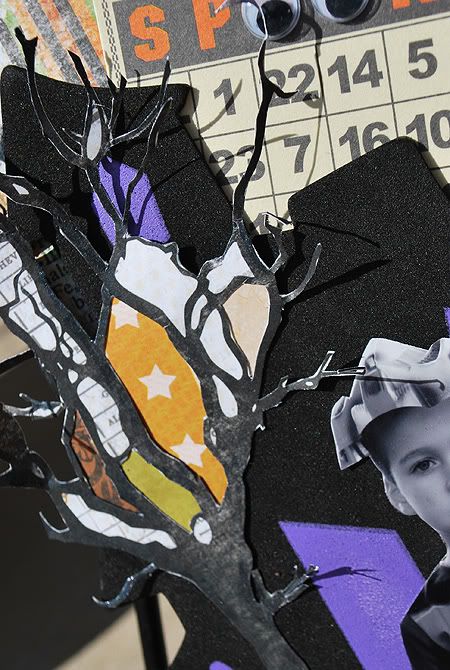
Here is a wall hanging i did with the Serendipity Scrapbooks Just Enough Kit. How flippin' COOL is it that kristen put guaze in the kit???????? AND these COOL foam houses?????? sorry, the googley eyes don't come with the kit, that is just my weird obsession with them.


Chris AND Julie gave me this cool blogger award! thanks guys ;)


So I have to list 10 honest things about myself...

1. i am not always honest. BAWAHAHAAWA! now let me clarify that...i am not always honest with myself about things such as the need to slow down, say no, things of that nature....


2. i am really really really really really really really bad at paperwork and both of my jobs need me to be good at it.


3. i can't stand smacking noises. smacking when you eat goes through me and when i hear that smacking noise of kissing on tv i have to change the channel!


4.i wanted to be an art historian and run a museum one day but i chose to move to colorado with my boyfriend and " be free" and then i just never followed that dream


5. i struggle with my faith everyday. i know a lot of people that i met online always seem so sure in this area but my faith isn't like that.


6. i never wanted to have kids. let me rephrase that...i never saw myself as a mom, in a house, cooking, with dogs and a husband... i wanted to live in NYC in a loft and just do my own thing but i met brian and he changed all that for me. now, i can't imagine not having them in my life and cherish every day with them.


7. i love my friends and think spending time with them is just as important as spending time with my family. i never understood how some people never have friends they hang out with.


8. i could eat pizza for every meal of every day.


9. i love sports and desperately want season tickets to the Phillies one day!


10. last but not least, i am a wino. i love to have a class of shiraz or cabernet when i come home from work and sit down to relax and do homework with owen.


okay here are my 9 fan-tabulos ladies!


drea
brandy
kayla
merrick
melanie
andrea
steph
pearl
carrie


have a great week!

Tuesday, September 22, 2009

Creative Cuts and More & Be Inspired # 50

Hope everyone is having a great wednesday! this is a super crazy busy week for me at work but that is okay, i have all day friday free and my scrap room is calling me! i also got good news last week that the business school where i teach asked me to come back for two more classes next term so i am super pumped about that.

Here is my latest project from Creative Cuts and more. I cannot get enough of these fun little die cut boxes. They are so fun to make. I thought this would be a great gift card holder for a baby or kid's birthday. This particular box is the crayon box. Make sure you check out 2Sketches4you b/c they are sponsoring this week's sketch with a card kit!

I used Sassafrass Lass pp's, ran it through my Cuttlebut and added a combo of Shimmerz spritz and Glimmer Mist to the raffia.


I did a tut on how to make paper bows over at the Cuttlebug Challenge blog this week! I have to admit, my wonderful friend Joanne showed me these first so this is not my original idea. But I love it and use it a lot...I have the measurements memorized, LOL.